Jason Hoppe Adobe Certified Expert & Adobe Certified Trainer
  • Home
  • Contact
  • Classes
  • Blog
  • Blog Index
  • Portfolio
  • Max 2022

Design Points n PixelS


INFOGRAPHIC SERIES - COFFEE CUP WITH FOAM

3/28/2016

3 Comments

 
Start any day off with a cup of coffee, or any day with a cup of coffee with some nice foam and a bit if shading. 
Picture

Picture
Start off with an oval, fill with a color, no stroke on the shape.
Picture
Create a rectangle over the top of the oval, using the Pathfinder Panel, use the Minus Front action to remove the top of the oval.
Picture
This forms the base of the cup but needs a flat bottom.
Picture
Repeat the process of drawing a rectangle at the bottom of the half-oval and use the Minus Front action in the Pathfinder Panel.

Picture
Here is the cup, now we need to add a handle.
Picture
Draw an oval, add a stroke to it, same color as the cup and no fill. 
Picture
To create the foam, start with a circle and fill with a light color.
Picture
Duplicate the circle so the center overlaps to the edge of the second circle.

Picture
Duplicate the circle several times in a row.
Picture
Duplicate the row and move it up so the centers of the first row are at the edge of the second row, now move it half way over to the left or right and remove the overhanging end circle.
Picture
Repeat the process with the second row to create the third row. These stack to form a smaller pyramid of circles.
Picture
With the top center most circle, use the Direct Selection Tool to select the top most point. Use the UP arrow to move the point up. 

Picture
Click the Convert Anchor Point in the Control Bar to create a corner point.
Picture
Select all the circles and foam tip, use the Unite Action in the Pathfinder Panel to create one single shape.
Picture
Take the foam and place it behind the coffee cup.
Picture
You can adjust the height of the foam to make it fit correctly.

Picture
To create a slip shadow on the cup, duplicate the bottom of the cup off to the left.
Picture
Select the cup base and the new shape you just duplicated, then apply the Divide Action in the Pathfinder Panel. Ungroup the resulting shapes and delete the left extra shape.
Fill the left shape with a darker color.
Picture
Duplicate the new, darker shape on the left side of the cup. Copy the shape and rotate the shape 180° and place it directly on top of the cup. 
Picture


Select the flipped shape and the foam, then apply the Divide Action in the Pathfinder Panel. Ungroup the resulting shapes and delete the left extra shape.

Color the new edge of the foam slightly darker.

​Enjoy!

3 Comments

INFOGRAPHIC SERIES - COLOR MODES, PIXELS & RESOLUTION, FILE FORMATS

3/25/2016

1 Comment

 
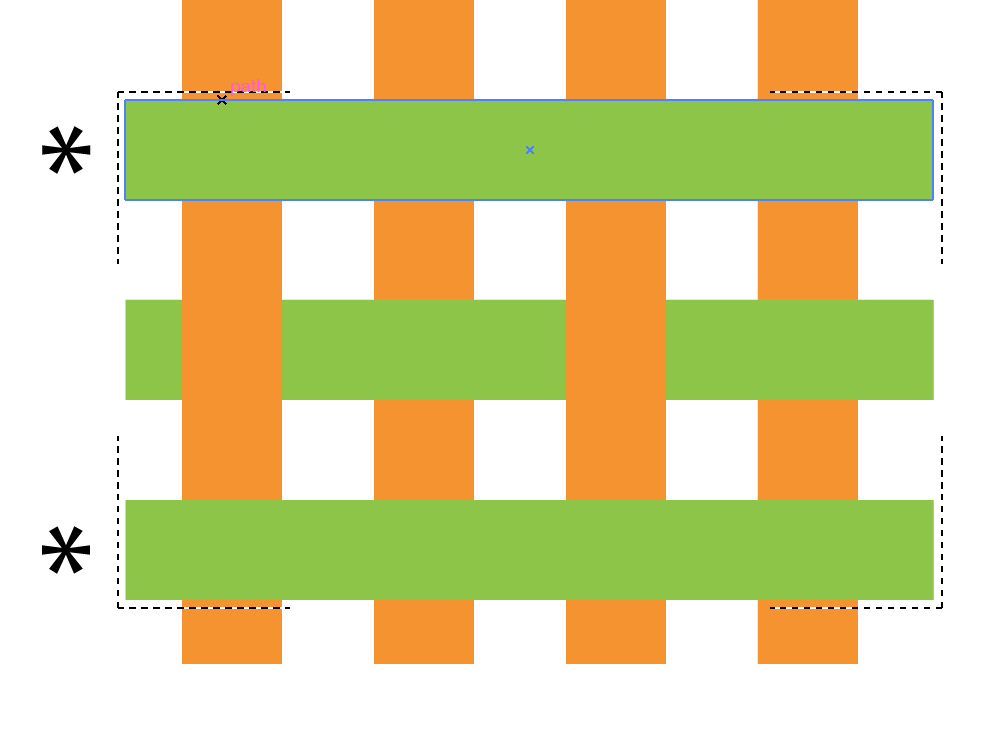
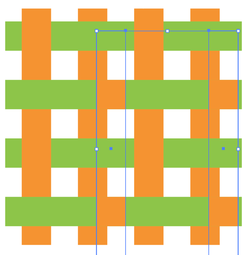
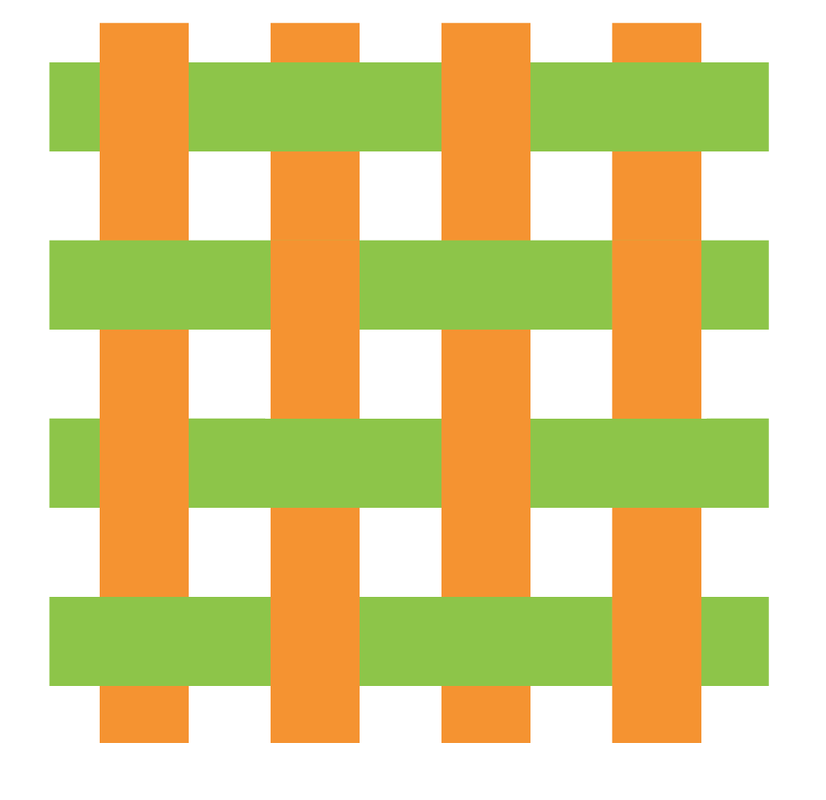
Spent some time creating these infographics for my class as we start learning all about photoshop! Fun exercise while I am here in Maui on vacation.
Picture
Picture
Picture
1 Comment

INFOGRAPHIC SERIES - WOVEN PAPER STRIPS

3/24/2016

0 Comments

 
Here is what looks like a simple lesson, but I can tell you, there are a few tricks you can learn from this one! To get this woven paper strip look, it would seem quite easy to take the strips and place them in front or behind the other strips, but to get this effect with just 4 green and 4 orange strips, is going to take a little magic. 
Picture

Picture
Start with a rectangle and fill it with a color, no stroke on it.
Picture
Duplicate the rectangle so you get equal spacing between all 4. 
Picture
Duplicate a green rectangle, turn it 90° and fill it with a contrasting color. Take the 2nd and 4th strip of green and bring these to the front. Object>Arrange>Bring to Front.
Picture
Duplicate the orange rectangle with equal spacing between them.

Picture
Take the 2nd and 4th ORANGE rectangles and copy them. Paste will come later, so just copy at this point.
Picture
Select the 2nd and 4th GREEN rectangles and make them into a Compound shape.
Object>Compound Shape>Make. This will make them act as 1 shape, you will see why shortly…
Picture
With the 2nd and 4th green rectangles selected and turned into a compound shape, go to the bottom of the tool bar and choose the Draw Inside Mode (far right of the 3 buttons)
Picture
This will activate a "clipping" around the selected rectangles. In fact this is really a clipping mask, but in a different way of getting to it, and in my opinion, easier for some types of construction like this one.

Picture
Then PASTE the copied 2nd and 4th orange rectangles and it will paste them INTO the "clipping area"... you are in Draw Inside Mode so anything you do will appear to be inside the selected items. They may not line up so move them to the 2nd and 4th position to line up with the vertical strips.
Picture
And this is the end result! Tricky but it works great. And it may cause you to get a bit lost in the process but give it a shot.
0 Comments

INFOGRAPHIC SERIES - Engraved Type Look

3/22/2016

0 Comments

 
My designer friend in Seattle, Darlin Gray (here at http://darlingray.com/) sent me a label she was working on and wanted to know how to do this cool, engraved-style on lettering on one of her projects. So here is how it is done.

If you have not used the Width Shape Tool, this is where the fun really begins!
Picture

Picture
Start with you type. Outline the fonts. Type>Create Outlines. SHIFT + COMMAND + O. Just for good measure, also Ungroup the letters.
Add a fill but no stroke around the letters.
Picture
Choose Object>Path>Offset Path. In this case I off set the path .075 cm to get the distance I wanted away from the original letter.
Picture
At first, it will look clunky. Take the newly offset path and add a .5pt stroke and no fill.
Picture
It looks much better with no fill and a slight stroke.

Picture
First select the outline with the Selection Tool and choose Object> Compound Path>Release.
​ 
Then, us
ing the Direct Selection Tool, you will need to remove the sections of line that you don't want to taper. 

Picture
With the line removed, select the Width Shape Tool (looks like a Chicken on a Skewer)
​
Picture
Picture
With the Width Shape Tool, Select the point on the line you want to make wider/narrower.

​ It does not need to be a "point" on a line, it can be at any location on the line, not specifically a "point".
Picture
Pull away from the line to make the stroke wider, push in toward the line to make it narrower.

Picture
This is the result of using the Width Shape tool to taper the stroke down to a narrow width.
Picture
When you have single line, you will need to taper one end, then in the middle of the line, make it wider before narrowing the other end.
If you narrow both ends and not widen the middle, the line will disappear.
Picture
Here is what the end result looks like!
Picture
This is how the engraved, offset-look appears once you are done with your magic.
0 Comments

INFOGRAPHIC SERIES - OPEN BOOK

3/19/2016

0 Comments

 
Create an open book with this tutorial. Simple shapes, add some curves to them and then some shading, this creates a simple, yet effect book.
Picture

Picture
Start with a rectangle, fill it with a color. No stroke.
Picture
Using the Curvature Tool (next to the Pen Tool in the Tool Bar), click on the upper middle of the rectangle and pull up. This will add a point and curve it as you pull up. 
Picture
Repeat the same process with the curvature tool on the bottom of the rectangle to mimic the top curve.
Picture
Duplicate the shape and place it to the side of the other shape.

Picture
Fill the shapes with a darker color. This will be the back set of pages, and the colors will get lighter as they stack on each other.
Picture
Duplicate the set of shapes, add a lighter color fill. With the Direct Selection Tool, select the two left points on the left shape, and move them up using your UP arrow key. Repeat the process on the other shape, moving the right points up the same amount.
Picture
This will give you pages that have less of a curve than the original curve.
Picture
Place then new shapes over the previous shapes and the book begins to take shape.

Picture
Repeat the duplicate, color change and move-point process a 3rd time to create a third set of pages, making the top color lighter than the bottom 2 colors.
Picture
Select the bottom 2 shapes and add a stroke to the INSIDE of the shape, that way it doesn't extend beyond the edge of the shape.
Go to your Stroke Panel and choose the Align Stroke to Inside button.
Picture
Picture
Select the right 3 shapes with the Select Tool.
Picture
Under the Edit Menu, choose Edit Colors>Adjust Color balance. Click on the Convert button and Preview button, then adjust the color to change the color of the selected shapes.

Picture
Copy the left page, reduce it in size the place it on the right page to create an picture box. DO the same with the right page, scale it down and move it to the left page to create another picture box.
Picture
Add a stroke around the "pictures" to create contrast.
Picture
Change the width of the pages to give it more depth and the appearance that the pages are turning.
0 Comments
<<Previous

    RSS Feed

    Archives

    March 2021
    February 2021
    December 2020
    September 2020
    August 2020
    July 2020
    June 2020
    May 2020
    April 2020
    March 2020
    February 2020
    January 2020
    December 2019
    November 2019
    October 2019
    September 2019
    August 2019
    July 2019
    June 2019
    May 2019
    April 2019
    March 2019
    February 2019
    January 2019
    December 2018
    November 2018
    October 2018
    September 2018
    August 2018
    July 2018
    June 2018
    May 2018
    April 2018
    March 2018
    February 2018
    January 2018
    December 2017
    November 2017
    October 2017
    September 2017
    August 2017
    July 2017
    June 2017
    May 2017
    April 2017
    March 2017
    February 2017
    January 2017
    December 2016
    November 2016
    October 2016
    September 2016
    August 2016
    July 2016
    June 2016
    May 2016
    April 2016
    March 2016
    February 2016
    January 2016
    December 2015
    November 2015
    October 2015
    September 2015

    RSS Feed

Proudly powered by Weebly
  • Home
  • Contact
  • Classes
  • Blog
  • Blog Index
  • Portfolio
  • Max 2022