
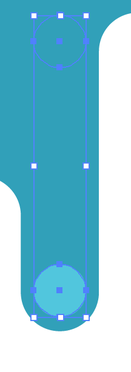
 Start by drawing a rectangle and filling it with a color, no border color. 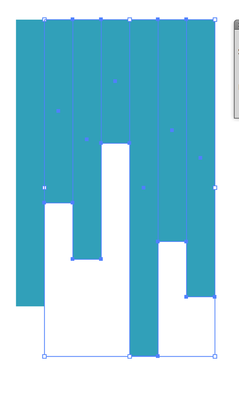 OPTION + CLICK and DRAG the rectangle several times to the side, making sure that there is no gap between each rectangle. Take each rectangle and stagger the height. For best results, stagger them long/short/long/short as shown. 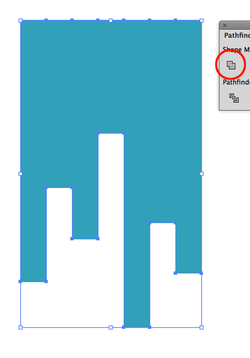 Select all the rectangles at once, then use the UNITE command in the Pathfinder Panel to make them all one object.  With the object still selected, switch over to the DIRECT SELECTION tool and don't click off the object. The Live Corner widgets will appear. Click on a corner widget and pull in until the RED LINES appear on the corners. This will show the maximum roundness of the corners.  And there is your drips!  To add some fade or action to your drips, draw a circle in on of the drips, centering it inside the drip.
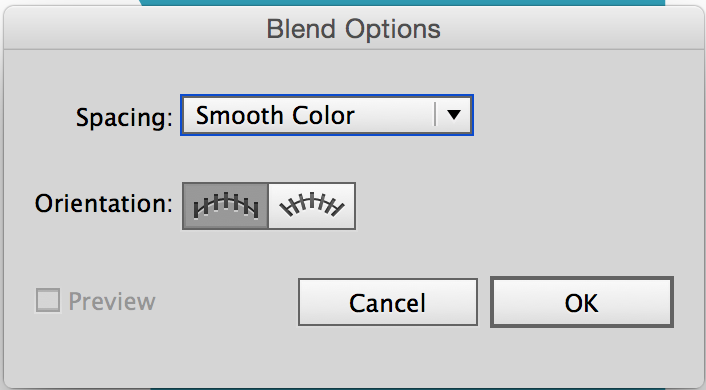
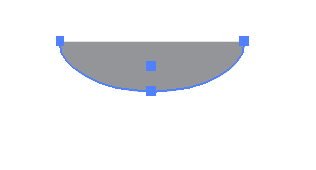
Select the Blend Tool from the Toolbar and double click on it. Set the options to be Smooth Color and click OK.
Select both circles, then select the Blend Tool and click on the center of one circle, then the center of the other circle. This will blend in Smooth color from one center to the other, leaving a nice fading drip.
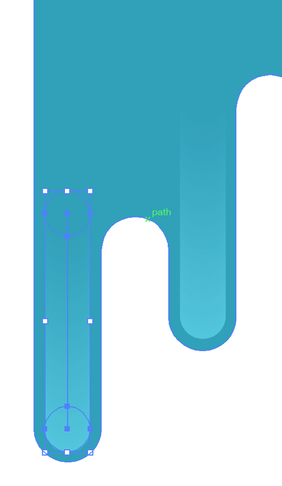
Copy the Drip Blend (its one unit at this point) to the other drips and center them on the drip. Now you have a wonderful active drip that blends nicely into the background and highlights at the end of the drip.
Enjoy and pass it along!
0 Comments
 Start this off by drawing a square - hold SHIFT down while drawing to constrain the square. 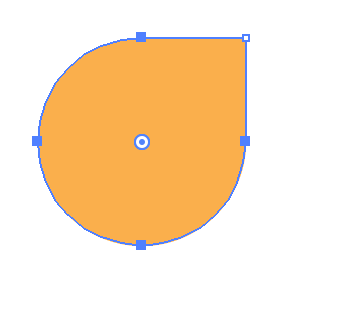 Using the DIRECT SELECTION tool, select the shape, HOLD SHIFT and click on one corner to deselect the corner. Drag the remaining 3 corner widgets toward the center of the shape until you see the RED limit show up. This will give you 3 rounded corners and one square corner. 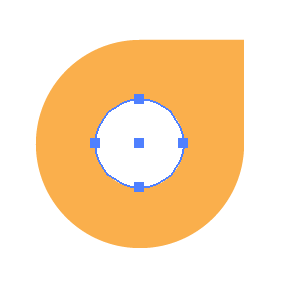 Hover your cursor over the "square" and find the center and hold OPTION + SHIFT to draw a circle from the center inside the shape.  Select both shapes and hold SHIFT and rotate the "head" to the position shown.  Make the body by drawing a circle placed to the lower right of the head.  Draw the "Feet" by starting with a circle, centered under the body using your Smart Guides to line up the circle of the feet with the circle of the body. 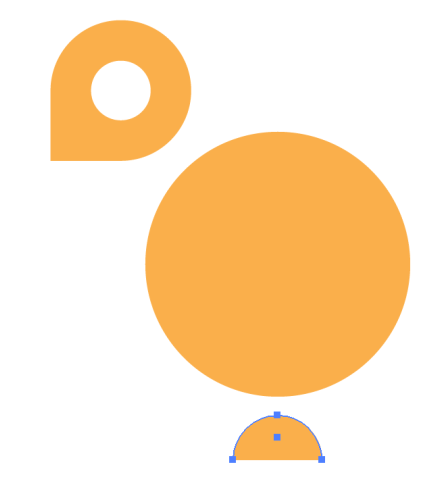 Use the Direct Selection tool to select jus the lower point on the circle and delete. Then use COMMAND + J to join the open paths together, leaving the half circle as the feet. 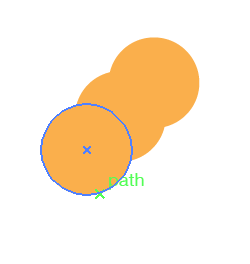 Draw a smaller circle. Use OPTION + CLICK an DRAG while holding SHIFT to duplicate the circle down and to the left at a 45° angle, making sure the center of the circle touches the edge of the first circle. Then use COMMAND + D to duplicate that circle once again. 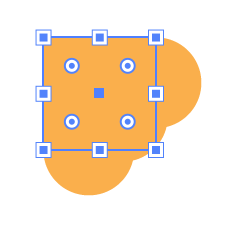 Draw a square from the left edge of the left circle and the top edge of the top circle.  Select the 3 circles and the square with the Selection Tool, then use the Unite command in the Pathfinder panel to combine them all into one shape.  Hold down the shift key and rotate the tail into position. You have yourself a finished bird.
Happy Thanksgiving everyone. This is coming to you from Montreal Canada instead of the usual Seattle WA. This infographic comes at the request of the students at Georgetown Day School in Washington DC and MIchelle Cobb teaching the infographic class there. And of course having just presented a lecture there, I thought a follow up with a great infographic was a nice way to round out a great day.  Start with drawing a line in Illustrator. I made this one 30 pts wide and rounded the end caps using the Stroke Panel, and added a color to it as well.  Selecting the first line, use the OPTION key to click and drag to duplicate the line down from the first line. Next, use COMMAND + D to duplicate. It's also under the Object Menu > Transform > Transform Again. I call it duplicate because it duplicates the last move/transform that was last done.  Using the DIRECT SELECT tool, click on the upper right point of the top line. Move the point down the line until the Smart Guides show that it lines up at the top of the second line. If your Smart Guides are not on, COMMAND + U turns them on.  Using the last line at the bottom as a reference I copy (select + OPTION + CLICK AND DRAG) the top line and place it over the last line at the bottom, lining it up with the line at the bottom. Then I delete the longer line, this was just used as placement.  Add a bottom line, colored gray, 8 pts wide and at a 15° angle for the bottom base.  Select the base gray line, click and drag while holding OPTION to duplicate the line down. Then use COMMAND + D to duplicate that move to get 4 more lines spaced the same distance apart.
Draw an oval. Then use the DIRECT SELECTION tool to click on the top point of the ova, then DELETE the point. This will leave you with a half oval shown on the right.  Then move the half oval into place under the base and you have a fluorescent light bulb icon. Create an Incandescent Light Bulb Icon  Draw a circle, hold SHIFT while drawing to get a perfect circle. Fill it with a color
Draw a rectangle and fill it with the same color as the circle. Select both the rectangle and the circle, then choose the Align Panel (Windows >Align) and choose the Horizontal Align Centers. This aligns them perfectly on their centers.
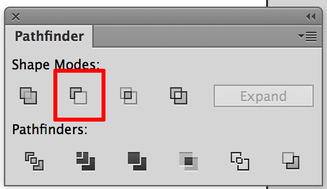
With both the circle and rectangle selected, click the Unite Shape Mode in the Pathfinder Panel (Window > Pathfinder). This combines both shapes into 1 shape.  Using the DIRECT SELECTION tool, drag over the two point shown highlighted in RED. This will select just the corner points and allow you to adjust the corners only on these two points. 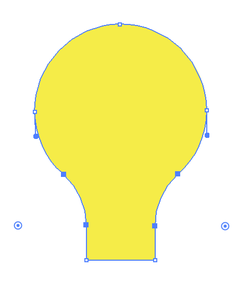 Pull the corner point widgets away from the corners to get the curve shown here. This gives the opposite curve back to the base.  Copy the base from the other light bulb, scale it and move it into place under the new light bulb!
If you have ever tried to create a larger of smaller version of a shape you have created in Illustrator, or put a larger field of color behind a letter the exact same shape of the letter... only larger, then this is tutorial for you. 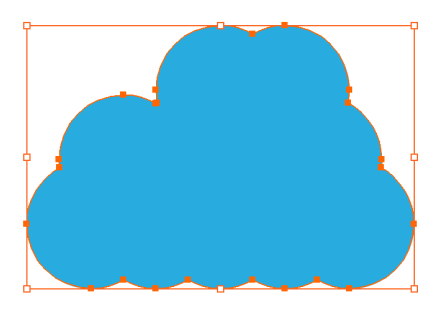 Start with any shape or letter/number. Make sure you outline a shape if its a path, or if it is type, use the Create Outline command under the Type Menu. In this case, I have a shape... a cloud I would like to create a smaller version inside to match the shape. 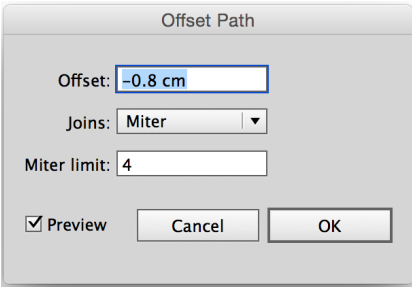 Choose Object > Path > Offset Path, then clock the preview button in the Offset Path Panel. Choose an offset. A positive offset will make a duplicate shape larger than your original, a negative offset will create a duplicate shape smaller than your original. 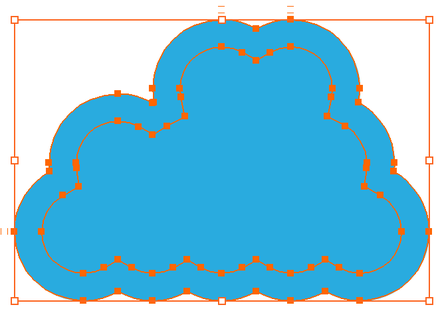 This is a -.08cm offset inside the cloud. Joins were set to MITER which gives me flat edges were it comes in from a point 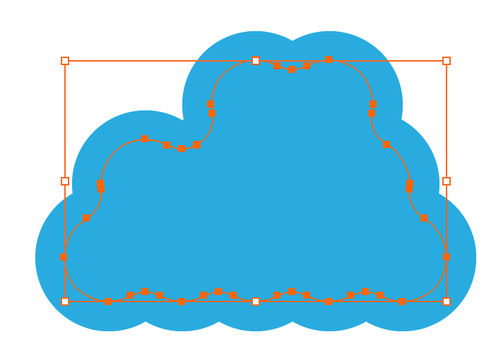 Joins were set to ROUND which gives me round edges were it comes in from a point  This is the result. Offset Path offset inside the shape, then filled with white.  This is the letter R, outlined then offset larger and then filled with orange to create a solid shape behind the letter that matches the outline . This works for any shape! Try it and pass it along.
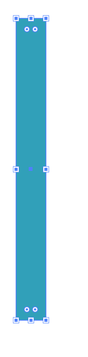
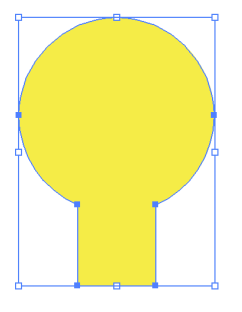
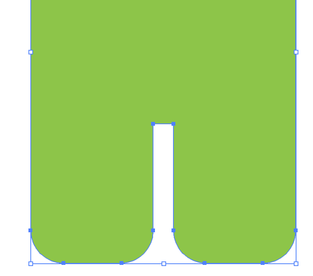
People are used in infographics all the time. Here is a simple way to create people who are non-gender specific yet are effective in showing people when an infographic needs people to help display the data. 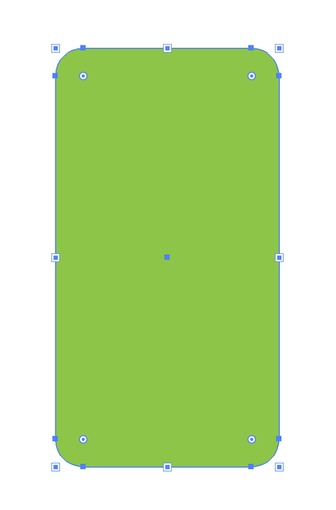 Start by creating a rectangle and add rounded corners. In this example I used 1 centimeter corner radius. TIP: While drawing the Rounded Rectangle, hold the mouse down while drawing and use the UP ARROW to round the corners while drawing. 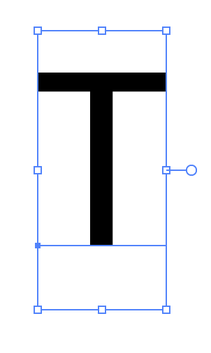 Type the letter T using a San Serif face. Simple and consistent weight lines with out extra detail is the key here. In this case I used Myriad Pro Regular. Convert the shape to outlines. Type > Create Outlines. 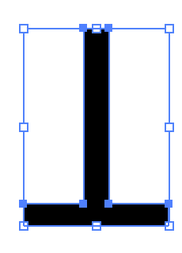 With the T now outlines, rotate the T 180° so that it points upside down. Use your shift key to rotate the T so that it will be exactly 180° from the original.
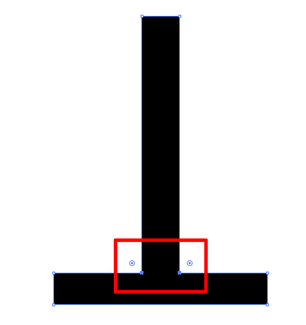
With the Direct Selection Tool, select just the 2 point as show with the red box. Once selected, pull the Live Corner Targets up to create a 1 centimeter corner radius.  Move the T so that it is centered on the rectangle and the arms are just touching the bottom of the rectangle. Using the Pathfinder Panel, select both the rectangle and T, then use the Minus Front Pathfinder Shape Mode.
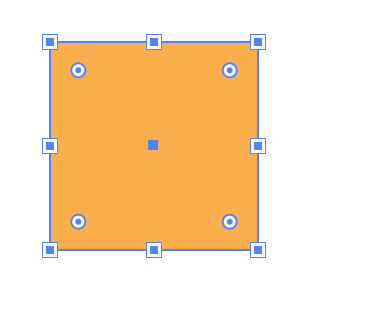
Add an circle to the upper part of the body. Use the circle tool and draw holding the SHIFT key to get a prefect circle. Align the circle with the center of the body with the Smart Guides.  Simple. Easy. And works great as well.
Now they can be your people too! |
Archives
March 2021
|


 RSS Feed