
|
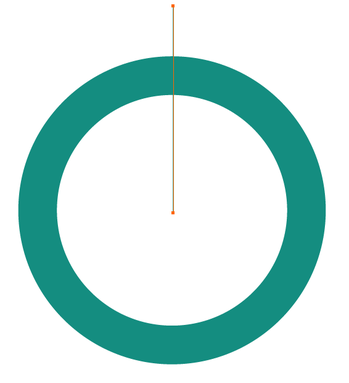
I had posted here a method to create a pie chart with accurate percentages, but this is a way to add a bit more interest within the chart. In this one, I made it look like the pie chart indication looks like a tube inside the chart instead of having separate wedges, they are unified by a single color that borders the lighter color.  Start with a drawing a circle. Hold SHIFT to create a perfect circle. Keep the fill off, add a stroke and set the point size (in this case it's 40 pt stroke) 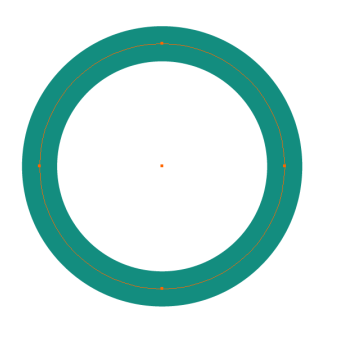 Outline the Path to convert the path to a shape. Object > Path > Outline Stroke. 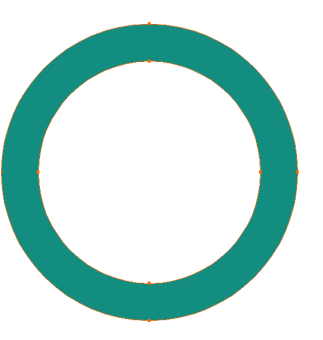 Draw a line from the center of the circle, hold the SHIFT down to create a vertical line. Draw the line beyond the outside edge and add a 1pt stroke to the line. Color of the stroke is not important as the line will go away... in a few steps.
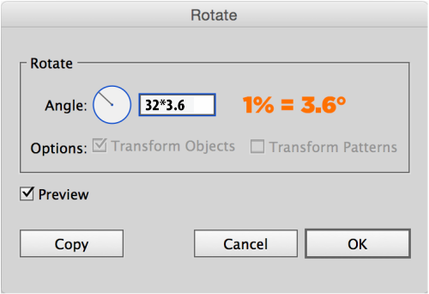
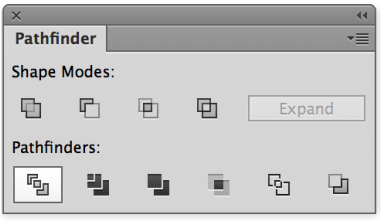
Select the vertical line, then select the Rotate Tool (R) and bring the cursor to the center of the circle, hold OPTION and click in the exact center of the circle. OPTION brings up the Rotate Dialog box, click relocates the reference point at which the rotate command will rotate around. With the rotate dialog box, you can convert a PERCENTAGE to degrees in a circle. 1% = 3.6° of rotation. Instead of using a calculator, you can do the calculations IN the field as shown below. In this case, I am using 32% and multiplying it by 3.6 DON'T CLICK OK, you want to click copy instead. The calculation in the field will then rotate the line but you want to COPY the line to keep the original vertical line and get the second line rotated to the new angle that is calculated. 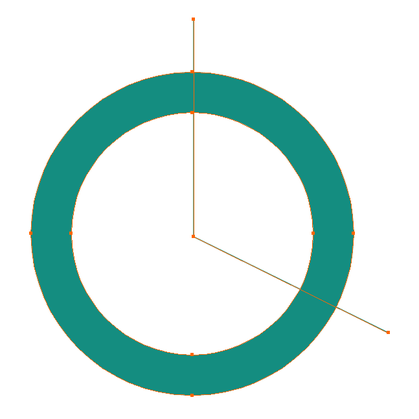 Select both lines and the circle. Using the Divide the action in the Pathfinder Panel, this will divide the circle at the line intersections. Then Ungroup the resulting shape (Object > Ungroup)  Select one section of the newly divided circle and change the color. The other section choose a lighter or darker color. Pick something that will offer decent contrast. 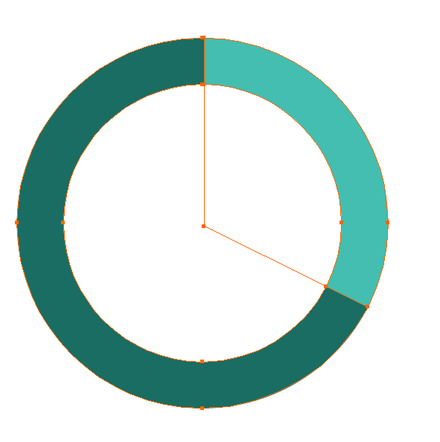 Then add a 12 pt stroke to both of the shapes using the same color as one of the segments. In this case I chose the darker green. 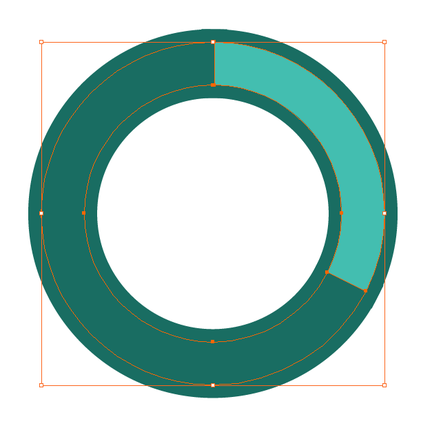 Using the Stroke Panel, set the stroke to the Outside so the stroke does not invade the segment and make it appear smaller. 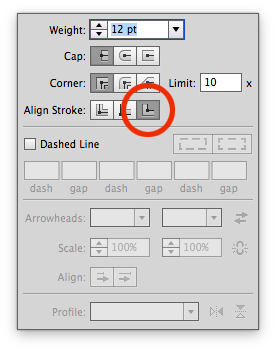 The final result with darker and lighter colors as outlines to show emphasis on either shape.
0 Comments
Live Corners in Illustrator are great for creating rounded, angled or inverse rounded corners on any shape that had a corner point. That means any square, rectangle, start or polygon has the ability to have the corners edited using Live Corners.
Live Corners appear on rectangles and square when you draw or select the shapes with the Selection Tool. On other shapes like a polygon or star, you will ONLY see the Live Corners when you use the Direct Selection Tool and click on the shape.  Once the shape is selected and you see the Live Corner "Targets", click on one and pull toward the shape center to change the corners... and in this case you get a Guitar Pick.
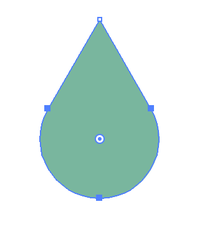
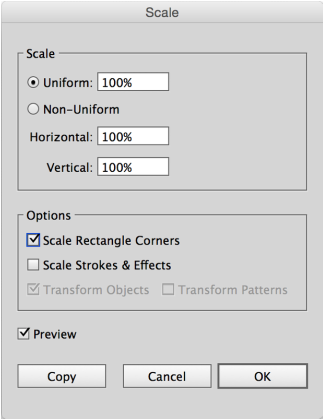
If you want to round a few corners but not all the corners, use the Direct Selection Tool to select just the corners you want to reshape. In this case, pulling in on the lower two corners gives you a Raindrop. When you pull in to the corner limits, you will see the corners appear in RED, showing that the corners can go no further in. 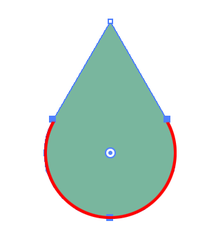 If you try to scale the entire object smaller, it will not scale the corners since they are at their max radius. If you increase the shape, the corners will stay the same size and make the shape look different.
To fix this, open the Transform Panel and check the Scale Rectangle Corners OR double click on the Scale Tool in the Tool Bar to set the preference to Scale Rectangle Corners.
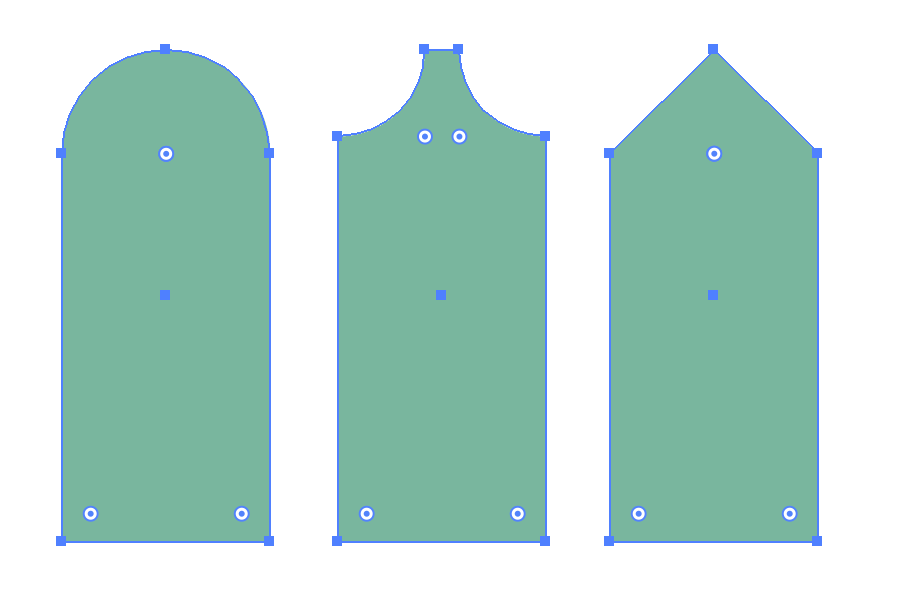
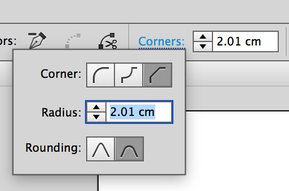
This shape started as a rectangle and the corners can be changed from the control bar Corners Menu. They can also be changed by selecting a corner on the shape with your Direct Selection Tool and OPTION click through the different corners while on a Live Corner. 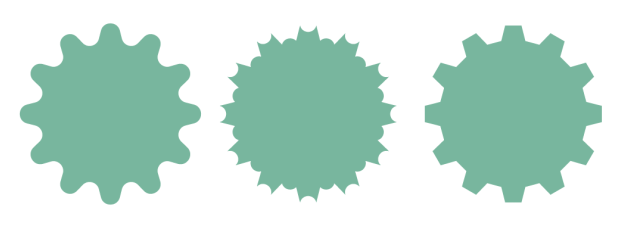 This is the result of the 3 Live Corner options when applied to a Star.
Rounded edges, Inverse rounded and Flat corners. Key to this is to NOT pull the corners ALL the way from the edges of the star, pull them half way into the curve then stop or else some of these results will not appear! Now you have a cupcake tin, funky burst and a gear. Enjoy. Creating a sun with rays or a gear with teeth... or even a flower with petals can be time consuming if you place each ray or tooth or petal one by one, rotating them into position then trying to space them out correctly. This method will make it fast, easy, and nice and tidy every single time and save you lots of time as well.  Draw a circle, holding SHIFT to make sure it is a perfect circle. Fill it with a color. You can add a stroke if you want. 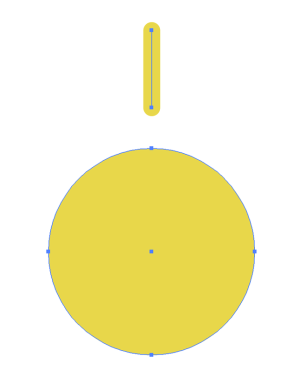 Draw a line vertically, making sure it is centered on the circle. Hold SHIFT to make it vertical. Use your Smart Guides when you draw to make sure it dead center on the circle.  Select the line, then select the Rotate Tool (R) from the tool bar. 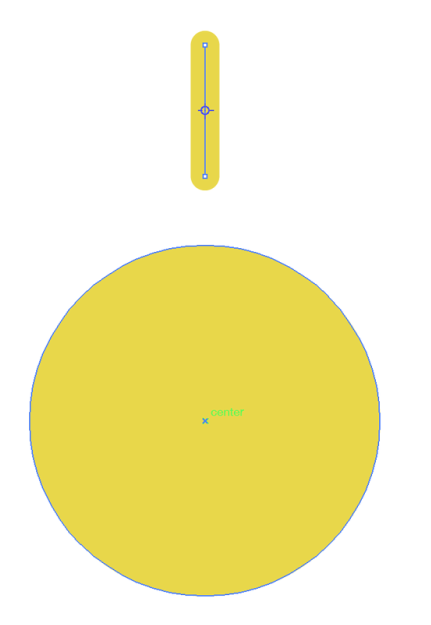 Once you select the line and the Rotate Tool, you will see a small center mark appear on the line, in the middle (center) of the line. This would allow the line to rotate around the center of itself. It needs to rotate around the center of the circle instead. Hold OPTION and with the Rotate Tool Selected, move to the center of the circle until the Smart Guide shows the CENTER of the circle. OPTION + CLICK in the center of the circle with the Rotate Tool. 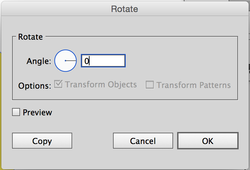 Holding OPTION opens up the Rotate dialog box, clicking puts the center of rotation at the circle center, not at the center of the line. 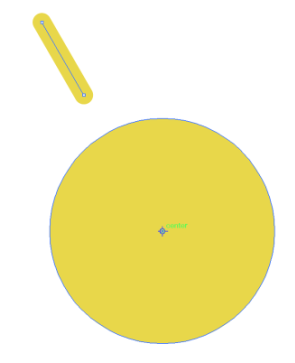 Enter in a value in the rotate field, keeping in mind hoy many "rays" you want. Make sure you choose a number that equally divides into 360 degrees or else the spacing of the "rays" will be off. If you want 10 rays, enter in 36 degrees, if you 12 rays enter in 30 degrees. Click on the preview button to see the effect. 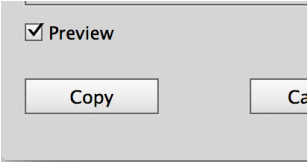 Click the COPY button, do not click the OK button. Copy will give ONE copy of the "ray", then the dialog box will close. 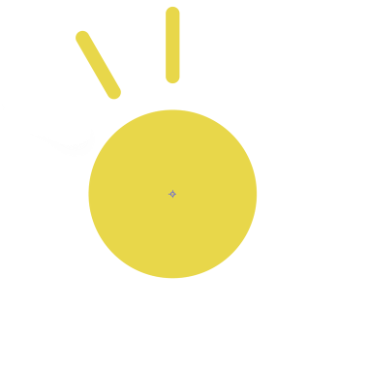 To repeat the ray, then choose Object > Transform > Transform Again or COMMAND + D. Keep using COMMAND + D and this will repeat the rotate and copy of the "rays" around the circle. Transform Again take the last operation that you did and simply repeats it as many times and you want. 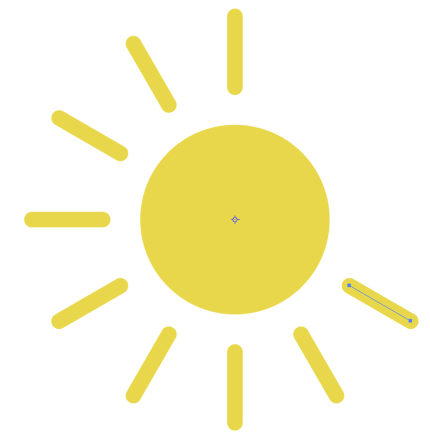 Keep repeating.... COMMAND + D, COMMAND + D, COMMAND + D,  And then you are done! And the sun shines, and all the rays are the same size, placed perfectly around the sun. You can make a gear by using squares instead of rays... 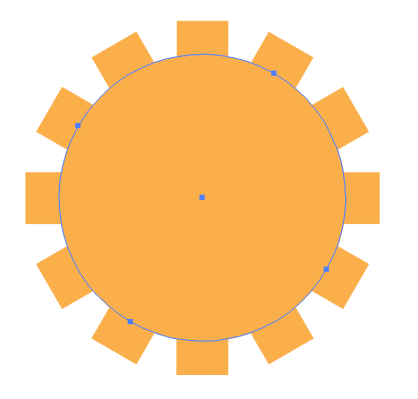 Or a flower with petals... All use the same set up and steps to repeat the object around a center point. 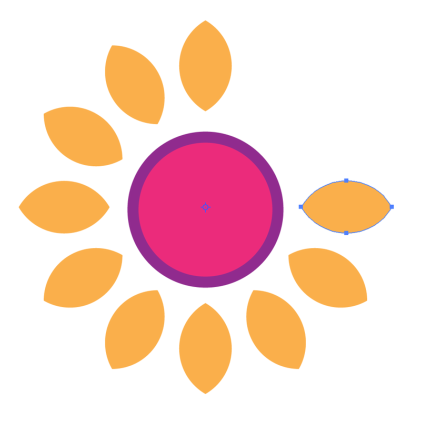 This is a great time saver and super fun. Share it and create great objects.
So yes, this is another simple build of paper with a bent corner, but cool none the less. Lets start with a rectangle, you choose the fill color.  With the Rectangle Tool selected, move the cursor to the UPPER RIGHT corner of the rectangle. Hold OPTION and SHIFT to draw a square, with the center right on the upper corner.  Fill the square with a darker color than you chose with the original rectangle. Note that the center of the SQUARE is exactly on the upper corner of the rectangle.  Use the Selection tool, hold SHIFT and hover over the upper right corner of the SQUARE, and rotate the image 45°.
With both the rectangle and the square selected, use the Divide Pathfinder Mode to divide the overlapping items. Ungroup the items (Object > Ungroup or SHIFT+ COMMAND + G) The select the upper right section that is not needed, leaving a triangle in the upper right as shown above.  Select the upper right triangle and hold SHIFT, hover over the outside corner of the square and rotate it 180° from the original position. This results in a turned upper corner. 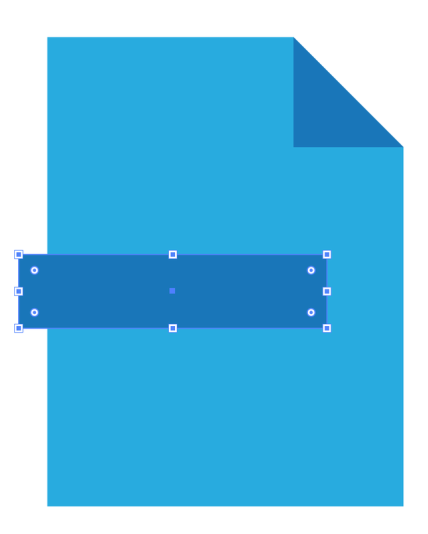 Draw a rectangle over the body of the original rectangle. Hang the left edge of the new rectangle over the edge.  Select the new rectangle, hold OPTION and click and drag (duplicate) the rectangle band down and fill it with a darker color than you have used before. 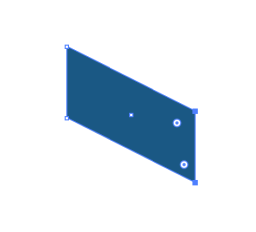 Use the Direct Selection Tool to select just the right 2 points of the newly duplicated rectangle. Hold SHIFT and use the keyboard Down Arrow to move the point down to shift the right edge down as shown. 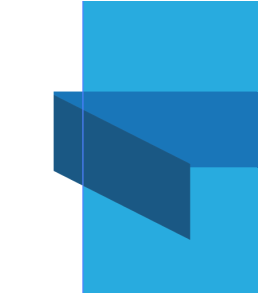 With the Selection Tool, move the shifted rectangle up into position on top of the rectangle band running across the main rectangle. Use the Smart Guides to align it to the very edge and points of the original rectangle. Send the shifted rectangle to the back. Object > Arrange> Send To Back or SHIFT + COMMAND + ]  And here is the end result. A paper look with the bent edge and band running over the top with a return.
It's that easy! Try it and share it. Lets create some ribbons and banners in Illustrator. As I have said in my other posts, this is easy. As all things are once you know how to do them!!! And this one is not exception. And it's fun as well. 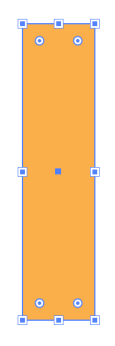 Draw a rectangle, add a fill color and no stroke. Duplicate the rectangle by using OPTION then click and drag to create a duplicate. Then rotate the rectangle 90° by using the move tool, hovering over an active corner, hold SHIFT and then rotate. 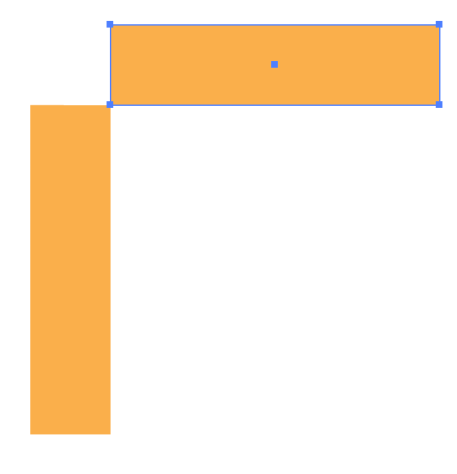 Select and move the rectangle so they touch at the corners. Use the Smart Guides (View > Smart Guides or COMMAND + U) to make the corner points touch each other. Fill one of the rectangles with a darker color. 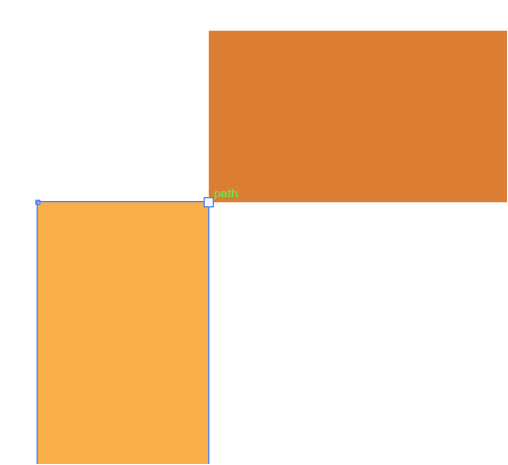 The darker rectangle will end up being the back part of the ribbon. Use the Direct Selection Tool to select the upper right corner of the lighter rectangle as shown above. Hold the SHIFT key and move the single select point UP to meet the upper left of the darker rectangle. 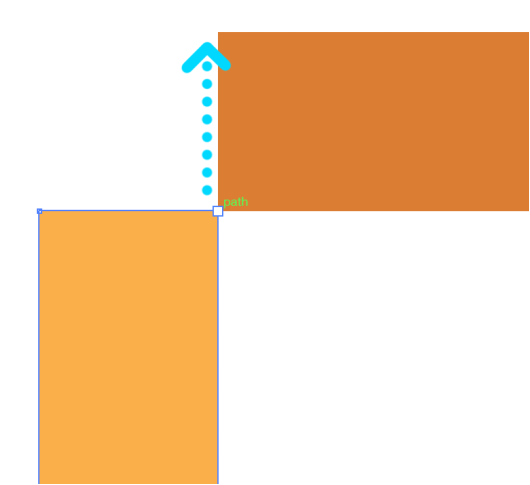 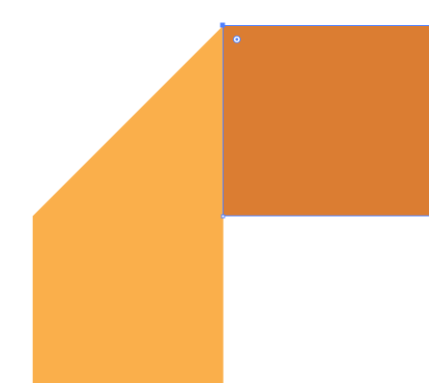 Moving the point up to meet the corner, it gives the appearance of a folded ribbon, using the darker color to make it look like it is the part of the ribbon behind the front ribbon.  Final ribbon turns forward and back depending on which corner you bring to meet the other edge.
This is great and simple, but it takes a few tries to make it go the right way that you want, but once you do, it looks super cool. |
Archives
March 2021
|


 RSS Feed