Jason Hoppe Adobe Certified Expert & Adobe Certified Trainer
  • Home
  • Contact
  • Classes
  • Blog
  • Blog Index
  • Portfolio
  • Max 2022

Design Points n PixelS


infographic series - curved ribbons

12/28/2015

1 Comment

 
Creating curved ribbons in Illustrator is not one of those things that makes a lot of sense when you think about how to curve them and make them look real.

But this makes it easy for both a curved ribbon and a ribbon turn as well.
Picture

Picture
Start with a rectangle, set it to no fill, but with a stroke. 
Picture
Select just the upper left corner with the Direct Selection tool and activate the Live Corner Widget.
Picture
Drag the corner widget into the center as far as it will go to form a rounded corner.
Picture
Select the lower right corner point with the Direct Selection Tool and delete. This will remove the right and bottom line.

Picture
Duplicate the line.
Select both line and Join them together.  Object>Path Join. Join twice to close both open ends. (COMMAND + J)
Picture
Switch the fill with the stroke. 

Chose the Reflect Tool and reflect the ribbon, click COPY to get a duplicate.
Picture
Picture
Change the color of the second ribbon to a darker color.

Picture
Send the darker ribbon to the back to make it look like it wraps around.
Picture
Create another rectangle, keep the same width as the height of the existing ribbon. Fill with the darker green.
Picture
Select the upper right of the light green ribbon with the Direct Selection tool and move it to the right side of the dark green rectangle.

Picture
Duplicate the ribbons and move them to the upper part of the vertical rectangle.
Picture
Select the lower right corner of the upper ribbon with the Direct Selection Tool and move it to the outside edge of the vertical rectangle to create the fold-over.
Picture
Upper and lower sections with curved ribbons with the center section with the fold-over.

Picture
Final ribbon with curves and roll-overs.
Picture
Some added elements to create more of an infographic!
1 Comment

infographic series - paper cut-out look

12/27/2015

0 Comments

 
Creating a paper cut-out look is quite easy using the Appearance Panel and the Width Shape tool.

We are going to create some weather icons for fun and use the Graphic Styles Panel to capture these setting and apply them easily later.
Picture

Picture
Start with a circle. holding SHIFT to make a perfect circle.
Picture
Use OPTION and click and drag the circle to create a duplicate and mov e it half way over the other circle.
Picture
Use COMMAND + D to duplicate it further.
Picture
Copy another set above the existing set to create a cloud.

Picture
Use the Pathfinder to Unite the circles, or chose Effect>Pathfinder>Add.
Picture
Open the Appearance Panel from the window menu. Add a white stroke, 9 pt, and click on the stroke OUTSIDE of the path by checking the button highlighted in red in the stroke panel.
Picture
From the bottom of the Appearance menu, choose the FX menu. Stylize, Drop Shadow.

Picture
Apply a drop shadow to the shape. 
Picture
Make sure you drag the drop shadow effect UNDER the fill section of the Appearance panel or else it will apply the drop shadow to the Stroke, just like you would move layers in the layers panel from one location to another.
Picture
Here is the result. Stroke is outside the shape and the drop shadow outside as well. If you apply the drop shadow to the stroke, it will appear on top of the fill.

Picture
Open the Graphic Styles Panel from the Window Menu and drag the cloud into the Styles Panel and it automatically adds the attributes (Stroke, Fill, Drop Shadow) into the Panel for future use.
Picture
Draw a circle and click on the new Style you just created in the Graphic Styles Panel and the circle will have all those attributes.

Picture
Select the sun and change the fill to yellow, it will keep all the other attributes (stroke and drop shadow). Send the sun to the back. Then add a few stars and click on the style from the Graphic Styles panel to apply all the attributes to the stars, then change the fill color to dark blue.

Picture
Add some rain drops. Inside they are filled with white then have an inner glow added.
Picture
Add an Inner Glow to the Rain Drops. Chose the FX button on the bottom of the Appearance Panel and choose Stylize>Inner Glow. Set the fields as shown with a light blue fill. You can drag the new rain drops into the Graphic Styles Panel to capture the rain drop settings for future use.

Picture
Drawn an arc, add a white stroke to the arc, about 20 pt.in this case. 
Picture
Picture
Click the FX button on the Appearance Panel and choose Stylize>Feather. Set the feather on the stroke to .2 cm.
Picture
Use the Width Shape Tool (SHIFT + W) and pull out the center handle on the curve to make it wider, and pull in on the ends to make them thinner.

Picture
Here is a close-up of the handles you get using the Width Shape Tool on the Path. The handles are what you pull in and out to pinch or widen the lines.
Drag the feathered arc into the Graphic Styles Panel.

Make another arc on the clouds, then click on the Feather Style you just created in the Graphic Styles Panel to get the arc to feather and pinch at the ends.
Picture
And that is how you make some simple cut-outs from Illustrator and save the Graphic Styles for later.
0 Comments

infographic series - String of Holiday lights

12/23/2015

0 Comments

 
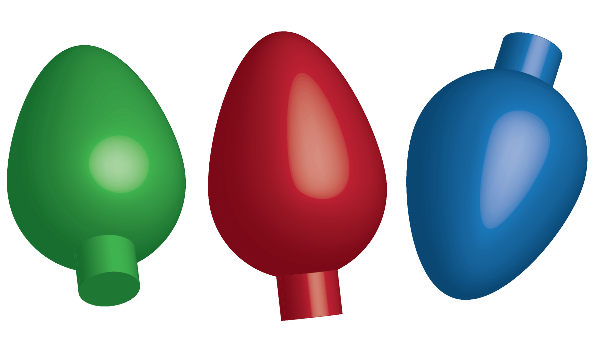
Tis the season for some holiday lights, so make some!
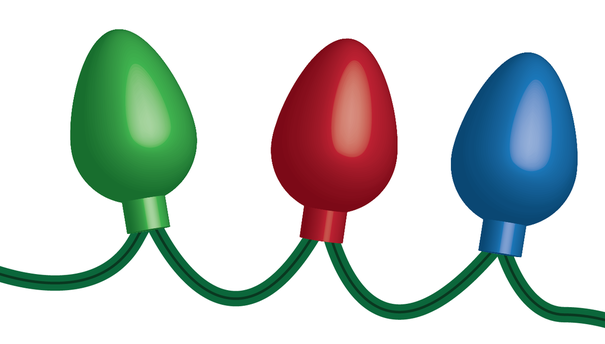
Start your holiday light by drawing a circle, hold SHIFT to make it a perfect circle.

Fill the circle with a color.

Use the Direct Selection Tool to select the top most point of the circle. Hold SHIFT and UP ARROW to make the more like the shape of a light bulb.
Picture
Picture

Draw a rectangle at the bottom of the light, making sure it is centered on the bulb.

Select the bulb and the rectangle base. Open the Pathfinder Panel (Window>Pathfinder) and choose the Unite button to combine the two shapes into one.

Create a rectangle and place it over half of the shape, making sure that the long edge of the rectangle is directly centered in the bulb.

Picture
Picture

Select the bulb and the rectangle and choose the Minus Front button in the Pathfinder panel.

The result with be half a blub.

​Under the Effects Window, choose 3D > Revolve.
Picture
Picture

The 3D revolve dialog box will open. Click the Preview button at the lower left of the dialog box.

Use the drop down menu (highlighted in red) and set the edge to be Right Edge. This will revolve around the right edge of the bulb.

The bulb will render on screen. If you want to rotate the bulb, use the 3D cube in the upper left, keeping in mind the face highlighted in Blue is the front face. Grab the cube and move it around to see how it rotates the bulb on the X, Y and Z axis.

​Click OK
Picture

If you want to change the color of the bulb, select the bulb with the selection tool and choose another fill color from the Swatches Fill Panel. It will automatically render in that color. Duplicate it and make several bulbs that are different colors.

To edit the rotation of the bulb, open the Appearance Panel under the Window menu. Select the bulb and then click on the 3D Revolve link in the Appearance Panel.

You cannot go back under the Effects menu and choose 3D revolve again, it will remove the 3D and you will start over.
Picture

Creating the Light Cord to attach the lights.

Draw a straight line, make it dark green. This line has a stroke of 8 pts.

Duplicate that line and leave a bit of space vertically between the 2 lines.
​
Add a 3rd line, make that a bit darker green and place it behind the other two lines (COMMAND + SHIFT + [)
Picture
Picture

Select all 3 lines and open the Brushes Panel from the Window Menu.

Click on the Brushes drop down menu (the cheese grater) and choose New Brush…

Select Art Brush and click OK.

Name the brush in the next Dialog Box and click OK.
Picture
Picture
Picture

Now draw a line using either the pencil tool, the pen tool or with the brush tool.

With the line selected, choose the green “power cord” you created in the brushes panel. You can adjust the width of the cord by adjusting the point size of the line.

Draw path to make it look like it connects with the lights.
Picture
Picture

To edit the rotation of the bulb, open the Appearance Panel under the Window menu. Select the bulb and then click on the 3D Revolve link in the Appearance Panel.
Picture


Picture

Happy Holidays!
0 Comments

infographic series - Making Snowflakes

12/23/2015

1 Comment

 
Lets make a Snowflake.
​Start with a line. Add a color from the Swatches panel and beef up the stroke weight to 7 pt.
Picture

Add more elements to the shapes.
​I added a half circle, then a Y shape, making sure everything is centered on the main center of the line.
Picture

Select all the items you have created and click on the Rotate Tool in the Tool Bar (R is the shortcut)
​
​Hold OPTION and click on the base point of the art work. It will open the rotate dialog box.
Picture

Choose an angle of rotation that is even divisible into 360°. In this case I chose 45° and then click COPY. Don’t click OK or it will not copy the selected items.

​Click COMMAND + D to repeat the rotate command several more times as the artwork repeats around the center point.
Picture
Picture

By changing the initial set of items, you can change the look of a snowflake quickly. 
​
​I have several snow flakes shown with just some subtle changes to the initial artwork, then rotate and copy it.
Picture
Picture

Picture
Picture
Picture
1 Comment

Infographic Series: Pine Tree with snow

12/15/2015

0 Comments

 
Lets make a pine tree, with a slip shadow. Darker on one side to give it some implied dimension. Simple. Then add some nice snow to it.

Start with the Polygon Tool.
Draw a Polygon, do not let off the mouse button. If you do click off, you will need to draw the Polygon again.

When drawing, with the mouse held down, use the down arrows on the keyboard to get 3 sides. Up arrow adds sides, down arrow takes sides away. Fill the shape with green.
Picture

With your new triangle selected, hit the Return key.
That will bring up the Move Dialog Box.

Click the Preview on in the lower left corner to see that actions when you put the values in the Position sections.

Set the Horizontal to O and the vertical to 1.5. Or enough to move the triangle down enough to create an off set like a tree would have. 

Click OK when you move the triangle down.
​
Picture

When the triangle is moved down, and copied as shown to the right, then use COMMAND + D to duplicate the triangle 4 more times.
Picture

When you have several triangles as shown, select all the triangles with the Selection Tool and open the Pathfinder Panel.
Window> Pathfinder.

Choose Unite to make all the triangles one composite shape.

​
Picture
Picture

With the triangles now United as one, choose the Effect Menu>Distort & Transform>Free Transform.

Select the base and pull the bottom side out to form a wider base and click OK.
Picture

Picture
Picture
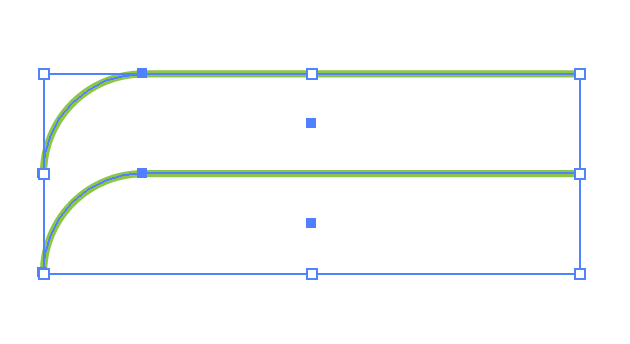
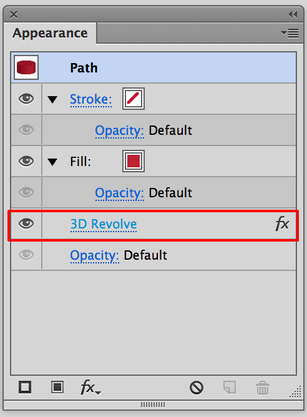
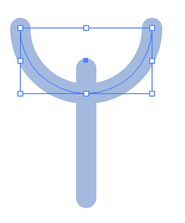
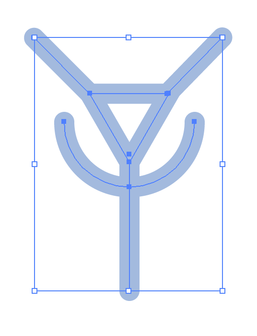
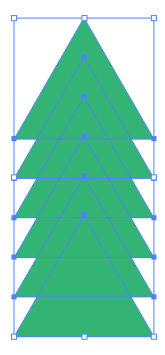
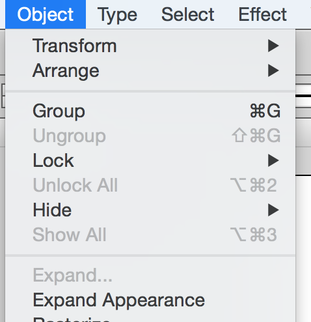
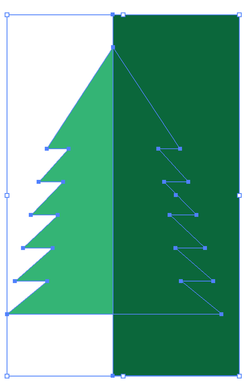
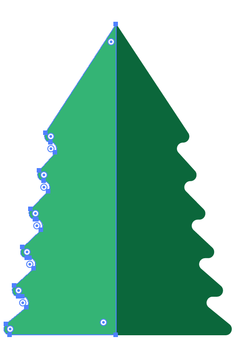
Choose Object>Expand Appearance to make the Shape of the tree the actual shape. This will give you the outline of the tree as it appears.

Draw a rectangle over the right half of the tree. Add a fill of a darker green. 

With both the tree and darker rectangle selected, open the Pathfinder Panel and choose Divide. 
Picture
Picture

When you click the Divide in the Pathfinder Panel, then choose Object>Ungroup. Use the Selection Tool to select the extra dark green outside the tree and click Delete.

This will leave both sides of the tree as separate shapes.
Picture

Select each shape with the Direct Selection Tool.

Pull the Live Corners into the center of the tree to round the corners.

​
Picture


Using the Brush Tool, choose no fill, a stroke color of white and 1 pt to start with. Add some dots of snow, then increase the brush size a bit to get bigger dots of snow.

​Enjoy your tree!
Picture
0 Comments
<<Previous

    RSS Feed

    Archives

    March 2021
    February 2021
    December 2020
    September 2020
    August 2020
    July 2020
    June 2020
    May 2020
    April 2020
    March 2020
    February 2020
    January 2020
    December 2019
    November 2019
    October 2019
    September 2019
    August 2019
    July 2019
    June 2019
    May 2019
    April 2019
    March 2019
    February 2019
    January 2019
    December 2018
    November 2018
    October 2018
    September 2018
    August 2018
    July 2018
    June 2018
    May 2018
    April 2018
    March 2018
    February 2018
    January 2018
    December 2017
    November 2017
    October 2017
    September 2017
    August 2017
    July 2017
    June 2017
    May 2017
    April 2017
    March 2017
    February 2017
    January 2017
    December 2016
    November 2016
    October 2016
    September 2016
    August 2016
    July 2016
    June 2016
    May 2016
    April 2016
    March 2016
    February 2016
    January 2016
    December 2015
    November 2015
    October 2015
    September 2015

    RSS Feed

Proudly powered by Weebly
  • Home
  • Contact
  • Classes
  • Blog
  • Blog Index
  • Portfolio
  • Max 2022