Jason Hoppe Adobe Certified Expert & Adobe Certified Trainer
  • Home
  • Contact
  • Classes
  • Blog
  • Blog Index
  • Portfolio
  • Max 2022

Design Points n PixelS


Infographic Series: Pine Tree with snow

12/15/2015

0 Comments

 
Lets make a pine tree, with a slip shadow. Darker on one side to give it some implied dimension. Simple. Then add some nice snow to it.

Start with the Polygon Tool.
Draw a Polygon, do not let off the mouse button. If you do click off, you will need to draw the Polygon again.

When drawing, with the mouse held down, use the down arrows on the keyboard to get 3 sides. Up arrow adds sides, down arrow takes sides away. Fill the shape with green.
Picture

With your new triangle selected, hit the Return key.
That will bring up the Move Dialog Box.

Click the Preview on in the lower left corner to see that actions when you put the values in the Position sections.

Set the Horizontal to O and the vertical to 1.5. Or enough to move the triangle down enough to create an off set like a tree would have. 

Click OK when you move the triangle down.
​
Picture

When the triangle is moved down, and copied as shown to the right, then use COMMAND + D to duplicate the triangle 4 more times.
Picture

When you have several triangles as shown, select all the triangles with the Selection Tool and open the Pathfinder Panel.
Window> Pathfinder.

Choose Unite to make all the triangles one composite shape.

​
Picture
Picture

With the triangles now United as one, choose the Effect Menu>Distort & Transform>Free Transform.

Select the base and pull the bottom side out to form a wider base and click OK.
Picture

Picture
Picture
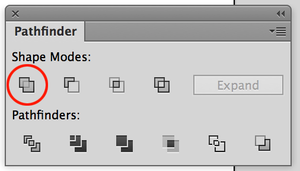
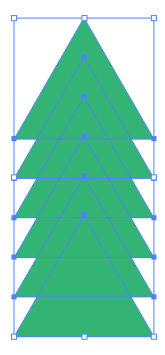
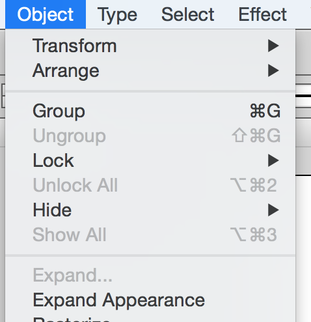
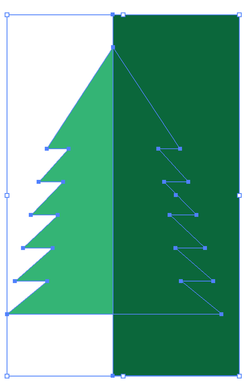
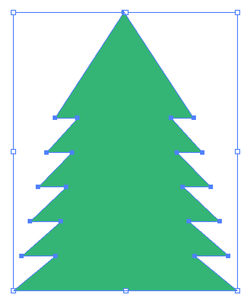
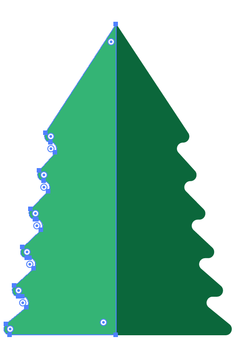
Choose Object>Expand Appearance to make the Shape of the tree the actual shape. This will give you the outline of the tree as it appears.

Draw a rectangle over the right half of the tree. Add a fill of a darker green. 

With both the tree and darker rectangle selected, open the Pathfinder Panel and choose Divide. 
Picture
Picture

When you click the Divide in the Pathfinder Panel, then choose Object>Ungroup. Use the Selection Tool to select the extra dark green outside the tree and click Delete.

This will leave both sides of the tree as separate shapes.
Picture

Select each shape with the Direct Selection Tool.

Pull the Live Corners into the center of the tree to round the corners.

​
Picture


Using the Brush Tool, choose no fill, a stroke color of white and 1 pt to start with. Add some dots of snow, then increase the brush size a bit to get bigger dots of snow.

​Enjoy your tree!
Picture
0 Comments


Leave a Reply.

    RSS Feed

    Archives

    March 2021
    February 2021
    December 2020
    September 2020
    August 2020
    July 2020
    June 2020
    May 2020
    April 2020
    March 2020
    February 2020
    January 2020
    December 2019
    November 2019
    October 2019
    September 2019
    August 2019
    July 2019
    June 2019
    May 2019
    April 2019
    March 2019
    February 2019
    January 2019
    December 2018
    November 2018
    October 2018
    September 2018
    August 2018
    July 2018
    June 2018
    May 2018
    April 2018
    March 2018
    February 2018
    January 2018
    December 2017
    November 2017
    October 2017
    September 2017
    August 2017
    July 2017
    June 2017
    May 2017
    April 2017
    March 2017
    February 2017
    January 2017
    December 2016
    November 2016
    October 2016
    September 2016
    August 2016
    July 2016
    June 2016
    May 2016
    April 2016
    March 2016
    February 2016
    January 2016
    December 2015
    November 2015
    October 2015
    September 2015

    RSS Feed

Proudly powered by Weebly
  • Home
  • Contact
  • Classes
  • Blog
  • Blog Index
  • Portfolio
  • Max 2022