Jason Hoppe Adobe Certified Expert & Adobe Certified Trainer
  • Home
  • Contact
  • Classes
  • Blog
  • Blog Index
  • Portfolio
  • Max 2022

Design Points n PixelS


INFOGRAPHIC SERIES - Fresh Baked Pie

9/25/2017

2 Comments

 
Since fall just arrived and things are cooling of it is time for some warm, home-made pie. And with the pumpkin spice everything craze I made it orange and brown. This is a quick one that is much faster than baking in from scratch.
Picture

Picture
Start with a rectangle, add a stoke to the shape.
Picture
Select the Free Transform Tool.
Picture
Pull the bottom sides in to form the pan. 
Picture
Use the Direct Selection Tool to select the shape and pull the corner widgets in slightly to round the edges. 

Picture
Draw a series of circles with a slight overlap on each one. 
Picture
 Use the Direct Selection Tool to select the top half of the merged circles and delete. ​Select them all, then use the Pathfinder >Unite to merge them into one shape.
Picture
Draw and oval that is the same width as the half set of circles. 
Picture
Set the oval in place, select both the oval and the half circles and join them together. Object>Path>Join or COMMAND + J.

Picture
Place the top on the pan. 
Picture
Draw 3 lines to form the slits in the top of the pie. Set the end caps of the lines rounded (hod dog the ends).
Picture
Fill the top and pan with color.
Picture
Draw a line for the steam.

Picture
Add a Wave Effect to the line. Effect>Distort & Transform>Wave. you want 2 ridges and a very slight, smooth wave.
Picture
Use the Width Shape Tool to pull the ends in to a point and pull the center point out to form the steam. 
Picture
Place the steam on the top of the pie, duplicate it as needed. 
Picture
Select the pie top and the pan. Duplicate them, Unite them and fill the new shape with white. 

Picture
Set the opacity of the shape to 20% and CUT the object to paste into the shapes. 
Picture
Click on the top and choose the Draw Inside Mode at the bottom of the Tool Bar. Choose Edit>Paste In Place. Then click back on Draw Normal mode.
Picture
Repeat this process of Draw Inside with the pan, then paste the white shape in place. Done!
2 Comments

INFOGRAPHIC SERIES - Milk / OJ carton

9/18/2017

0 Comments

 
Create a milk or orange juice carton, or any type of carton in Illustrator. Simple shapes and then you can use the Recolor Artwork to change the color on the entire object at once.
Picture

Picture
Create a rectangle. Add a stroke.
Picture
Use the Direct Selection Tool to select the top two points of the rectangle. Drag the corner widgets into the center then switch the corners from round to flat. 
Picture
Place both shapes together. 
Picture
Duplicate the rectangle directly on top of the previous rectangle. 

Picture
Use the Direct Selection Tool to select the two top points of the new rectangle and pull the top down to form the panel for the top of the carton.
Picture
Notice the edges stick out beyond the edges. Open the stroke panel and set the miter limit down until the sharp points on the shape go away.
Picture
Adjusting the miter limit takes the sharp edges away.
Picture
Add a black rectangle to the top of the carton.

Picture
Add a triangle to show depth.
Picture
Add a fill to each panel to give it some added dimension.
Picture
Create a rectangle and fill it with a darker color. Copy the rectangle. 
Picture
Select the front panel, select the Draw Inside Mode at the bottom of the tool bar. Paste the shape into the front panel. Click back on Draw Normal mode when done. 

Picture
Add some lines on the front of the carton. 
Picture
Add a darker triangle to the upper right side to give it more shading. 
Picture
Copy the carton, then you can change the color. Under Edit> Edit Colors> Recolor Artwork. Click the edit tab to call up the color wheel. Adjust the Hue, Saturation and Brightness to change the colors. 
Picture
Change the color and make it into an orange juice carton or whatever you want to change the color to. 
0 Comments

INFOGRAPHIC SERIES - Sponge with bubbles

9/10/2017

0 Comments

 
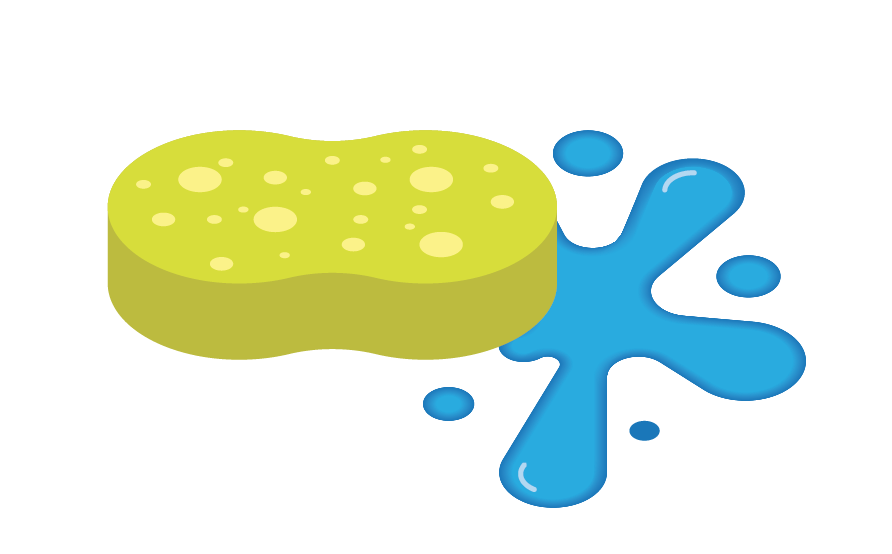
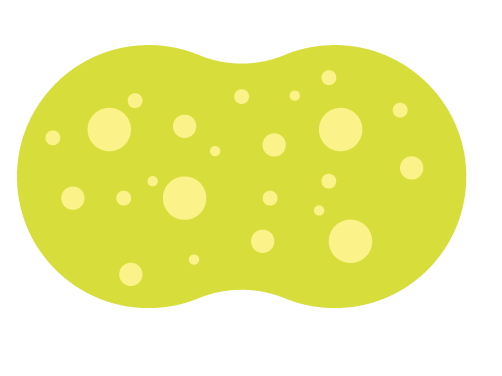
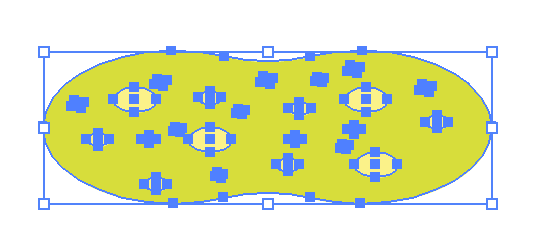
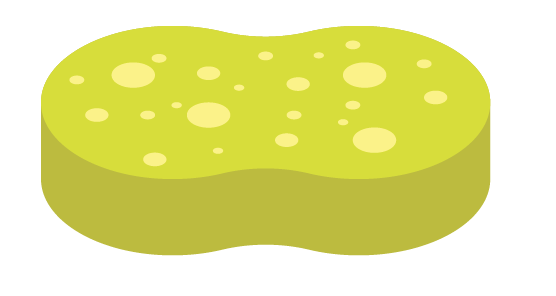
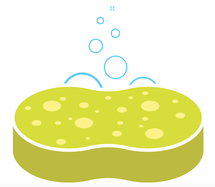
Create a 3D sponge icon with soap bubbles or use the splash icon build to create a water splash under the sponge. I like this one with the soap bubbles that pop!
Picture
Picture

Picture
Create a circle. Add a fill, no stroke. 
Picture
Duplicate the circle so there is a slight overlap. 
Picture
Select both shapes, use the Pathfinder Unite mode to make them one shape. 
Picture
Use the Direct Selection Tool to select just the two center points to activate the corner widgets. Pull the widgets out to create a slight curve. 

Picture
Add several circles to the surface, change the fill color slightly. Copy the main shape.
Picture
Select all the shapes and group them. Then shorten the height of the group. 
Picture
Paste the main shape twice. 
Picture
Use the Direct Selection Tool to remove the lower section of the top and the upper section of the bottom shape. 

Picture
Use the Join command (Command + J) to join the two shapes together.
Picture
Darken the color slightly for the base of the sponge.
Picture
Place the top group on top of the sponge base. 

Picture
Create some bubbles, use circles with a stroke of a light blue. Use 4 lines to create small bubble burst. 
Picture
Add a white stroke to the top shape. Add the bubbles behind the sponge. 
Picture
Add a water splash under the sponge. This water splash tutorial will show you how to create it. 
0 Comments

INFOGRAPHIC SERIES - Create a Log

9/5/2017

0 Comments

 
Summer is here, you go camping, create a camp fire or just need to make a log for decoration. Here is how you do it! 
Picture

Picture
Create a rectangle, fill it with brown, no stroke.
Picture
Use the Direct Selection Tool to select the end 2 points and pull the corner widgets into the max amount. 
Picture
Draw several black lines for the bark, They do not need to be spaced equally apart. Group the lines. 
Picture
Apply a Tweak Effect to the lines. Effect>Distort & Transform>Tweak.

Picture
Apply a Roughen Effect to the lines as well. ​Effect>Distort & Transform> Roughen.
Picture
Use the Width Shape Tool to change the width of the lines to give them variation. 
Picture
Change the color of the lines to be a slight contrast to the background color. 
Picture
Cut the lines, select the log, choose the Draw Inside Mode at the bottom of the Tool Bar. Paste the lines into the shape, then choose the Draw Normal mode at the bottom of the Tool Bar. 

Picture
Draw a circle on the end. Add a stroke the same color as the lines. 
Picture
In the Stroke Panel set the stroke to be inside the shape. 
Picture
Use the Spiral Tool to draw a spiral for the end of the log. This one is 10 segments. 
Picture
Place the spiral in the end of the log. 

Picture
Use the Width Shape Tool to widen the spiral at the outside end and narrow it in at the center end.
Picture
Draw 2 circles and move them  so they over lap 50%. Use the Pathfinder Panel and choose the Intersect Mode. 
Picture
Put an outline around the "eye".
Picture
Use the Curvature Tool to warp the shape to make it look like a knot. ​Place the knots on the log.

Picture
Draw a line for a branch. 
Picture
Add a Roughen Effect to the branch. 
Picture
Create a leaf by creating 2 circles, overlap them 50% then use the Pathfinder Intersect Mode. 

Picture
Place the leaves on the branch. 
Picture
Select the log, end and spiral and add a Roughen Effect to them as well. 
Picture
You now have a rustic log!
0 Comments

    RSS Feed

    Archives

    March 2021
    February 2021
    December 2020
    September 2020
    August 2020
    July 2020
    June 2020
    May 2020
    April 2020
    March 2020
    February 2020
    January 2020
    December 2019
    November 2019
    October 2019
    September 2019
    August 2019
    July 2019
    June 2019
    May 2019
    April 2019
    March 2019
    February 2019
    January 2019
    December 2018
    November 2018
    October 2018
    September 2018
    August 2018
    July 2018
    June 2018
    May 2018
    April 2018
    March 2018
    February 2018
    January 2018
    December 2017
    November 2017
    October 2017
    September 2017
    August 2017
    July 2017
    June 2017
    May 2017
    April 2017
    March 2017
    February 2017
    January 2017
    December 2016
    November 2016
    October 2016
    September 2016
    August 2016
    July 2016
    June 2016
    May 2016
    April 2016
    March 2016
    February 2016
    January 2016
    December 2015
    November 2015
    October 2015
    September 2015

    RSS Feed

Proudly powered by Weebly
  • Home
  • Contact
  • Classes
  • Blog
  • Blog Index
  • Portfolio
  • Max 2022