|
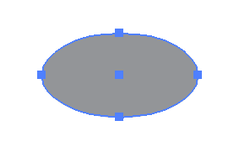
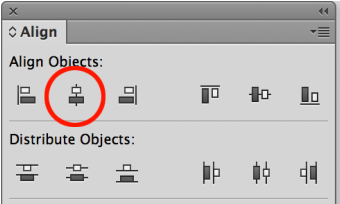
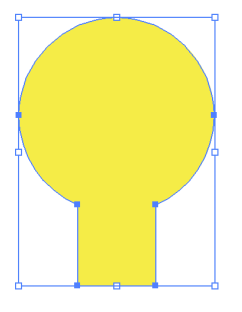
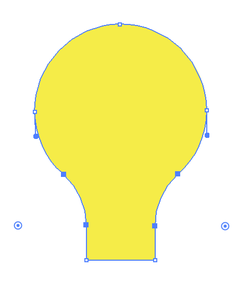
This infographic comes at the request of the students at Georgetown Day School in Washington DC and MIchelle Cobb teaching the infographic class there. And of course having just presented a lecture there, I thought a follow up with a great infographic was a nice way to round out a great day. Start with drawing a line in Illustrator. I made this one 30 pts wide and rounded the end caps using the Stroke Panel, and added a color to it as well. Selecting the first line, use the OPTION key to click and drag to duplicate the line down from the first line. Next, use COMMAND + D to duplicate. It's also under the Object Menu > Transform > Transform Again. I call it duplicate because it duplicates the last move/transform that was last done. Using the DIRECT SELECT tool, click on the upper right point of the top line. Move the point down the line until the Smart Guides show that it lines up at the top of the second line. If your Smart Guides are not on, COMMAND + U turns them on. Using the last line at the bottom as a reference I copy (select + OPTION + CLICK AND DRAG) the top line and place it over the last line at the bottom, lining it up with the line at the bottom. Then I delete the longer line, this was just used as placement. Add a bottom line, colored gray, 8 pts wide and at a 15° angle for the bottom base. Select the base gray line, click and drag while holding OPTION to duplicate the line down. Then use COMMAND + D to duplicate that move to get 4 more lines spaced the same distance apart. Draw an oval. Then use the DIRECT SELECTION tool to click on the top point of the ova, then DELETE the point. This will leave you with a half oval shown on the right. Then move the half oval into place under the base and you have a fluorescent light bulb icon. Create an Incandescent Light Bulb Icon Draw a circle, hold SHIFT while drawing to get a perfect circle. Fill it with a color Draw a rectangle and fill it with the same color as the circle. Select both the rectangle and the circle, then choose the Align Panel (Windows >Align) and choose the Horizontal Align Centers. This aligns them perfectly on their centers. With both the circle and rectangle selected, click the Unite Shape Mode in the Pathfinder Panel (Window > Pathfinder). This combines both shapes into 1 shape. Using the DIRECT SELECTION tool, drag over the two point shown highlighted in RED. This will select just the corner points and allow you to adjust the corners only on these two points. Pull the corner point widgets away from the corners to get the curve shown here. This gives the opposite curve back to the base. Copy the base from the other light bulb, scale it and move it into place under the new light bulb!
0 Comments
Leave a Reply. |
Archives
March 2021
|








 RSS Feed